How to paint cream kitchen cabinets step by step best brand
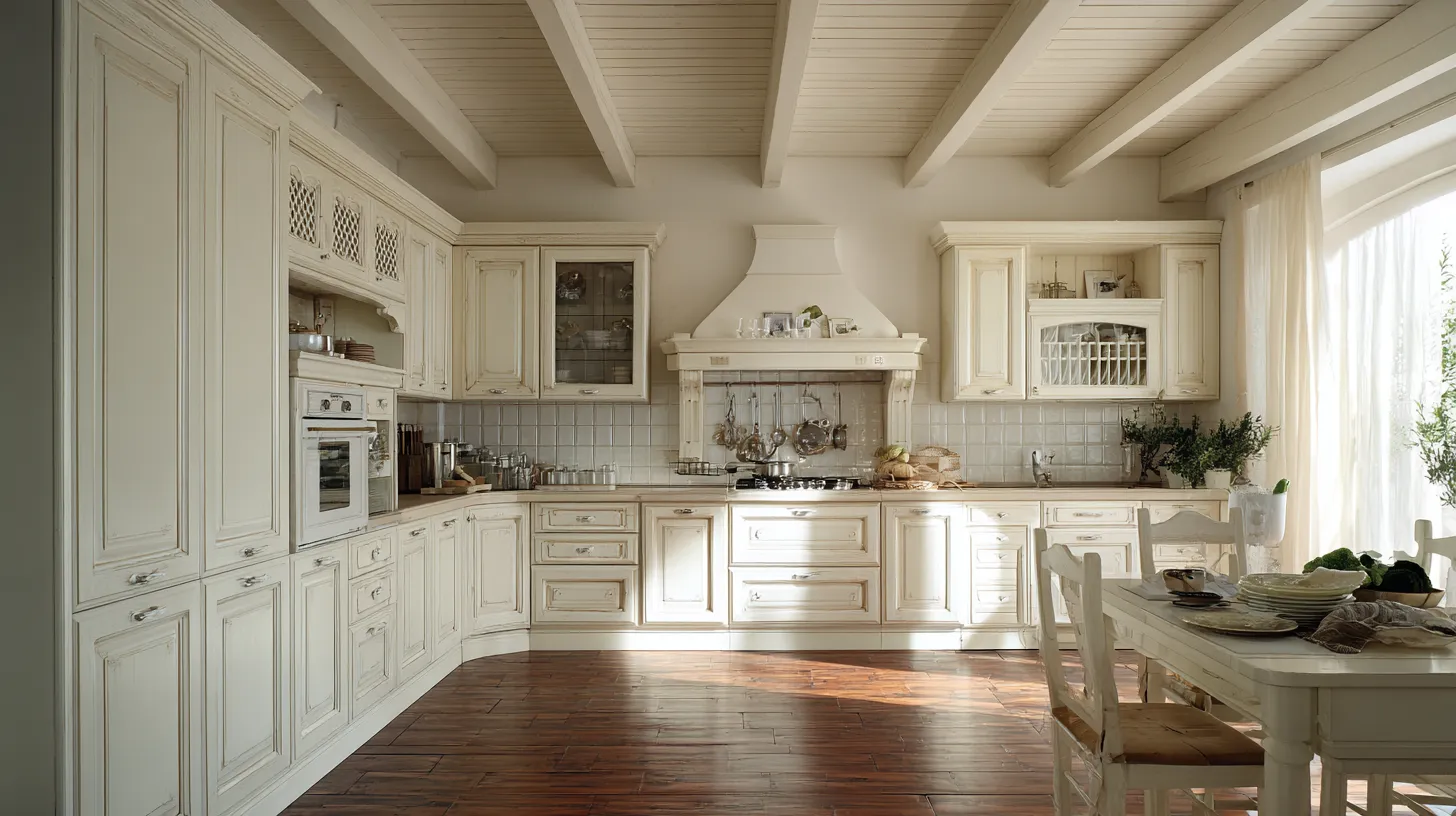
I once painted my cabinets a shade from the swatch called Subtle Cream. Under my kitchen’s warm bulbs, that subtle turned banana milkshake overnight. I cried. Then I bought different bulbs, swapped the hardware, and added a pale gray-green on the walls, and suddenly it looked expensive, no, yogurt. Point is: cream kitchen cabinets can be dreamy, but undertones and pairings matter, ask me how I know.
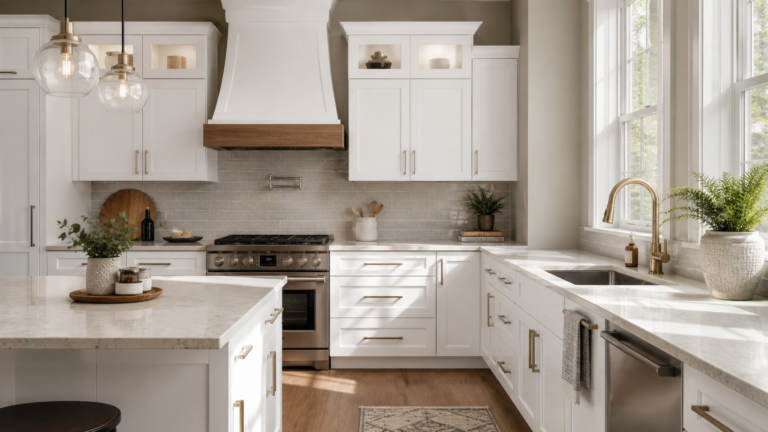
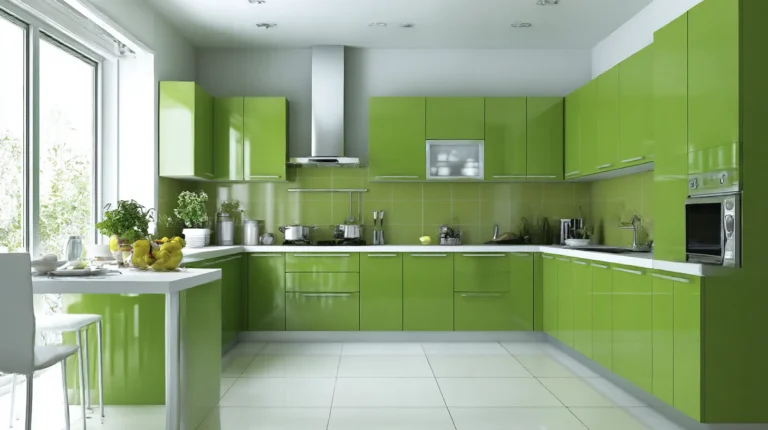
Cream kitchen cabinets are off-white cabinets with a hint of warmth, yellow, beige, or peach. They’re timeless, forgiving, and softer than bright white. To keep them modern today, 1 use bold, streamlined hardware, 2 add contrast (walls, island, or floors, and 3 pair cream with natural counters, backsplashes, marble, quartz, pale woods. Domino literally calls out oversized hardware + natural counters as the update combo that keeps cream from feeling dated.
What cream actually means, undertones, LRV, sheen
Cream isn’t white-but-shy. It’s white with undertones, usually yellow, beige, or a tiny green/pink whisper. That whisper gets louder next to your counters, backsplash, and light bulbs (yep, bulb temperature can swing a color warm or cool, 2700–3000K reads warmer, yellower, 4000K+ looks cooler, bluer.
LRV = your secret decoder.
Light Reflectance Value tells you how much light a color bounces back, 0 = black, 100 = pure white. Higher LRV creams = brighter, airier; lower LRV creams = moodier, creamier. Paint brands publish LRV for each color, so you can compare on paper before you buy 14 samples. Ask me how I know.
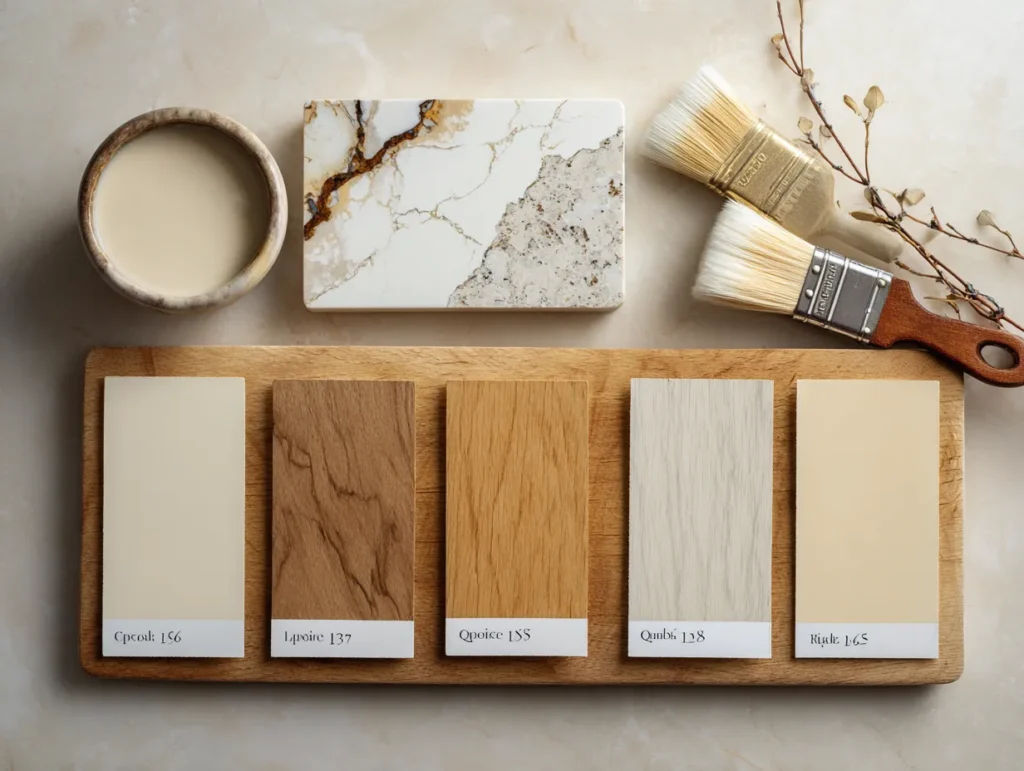
Quick picks to sample cabinet-friendly, widely loved
-
BM Swiss Coffee, BM Natural Cream, Farrow & Ball Wimborne White, F&B School House White, designer go-tos that play nicely with wood and stone.
-
If you want wall partners that flatter cream kitchen cabinets, try soft beige, green notes like SW Comfort Gray LRV 54 or BM Revere Pewter, when undertones align with your cream. Translation: sample first
Sheen, aka how shiny your cabinets should be
-
Satin = velvety, hides more flaws, still wipeable, great if your doors aren’t perfect.
-
Semi-gloss = brighter, tougher, shows more texture, but cleans like a champ.
Cabinet-rated enamels, Sherwin-Williams Emerald Urethane Trim Enamel, come in satin, semi-gloss, and gloss, made to level, smooth, and resist yellowing/constant cleaning. If you love a soft look, go satin; want max wipeability and a little “pop? Semi-gloss.
How to test like a pro and stay sane
-
Pull 3–5 creams from the same family, warm-greige vs. buttery
-
Paint sample boards and tape them on two walls window wall + opposite wall.
-
Check morning, noon, night, and under your actual bulbs, try 3000–3500K if your cream reads too yellow.
-
Park samples beside your counter + backsplash, undertones argue there first.
-
Decide sheen last, after color, once you’ve seen how much texture your doors show. Satin forgives. Semi-gloss flaunts
Will cream look dated in 2025? Not if you do these 3 moves
Short answer: Cream kitchen cabinets can feel super current if you style them on purpose. Here’s the easy, budget-friendly formula I use with clients and my own chaotic house
1. Upgrade the jewelry, aka hardware
Chunkier, more streamlined pulls = instant modern. I’m talking long bar pulls or simple cups in brass or matte black. Domino literally calls out oversized hardware + natural counters as the magic combo that keeps cream fresh, not fussy.
Pro tip: go 1/3 the drawer width for pull length (ish). Round up if you want that designer “bold” look. Black or brass also gives contrast, so cream doesn’t read flat; even BHG shows cream+white with black accents, hardware to sharpen things.
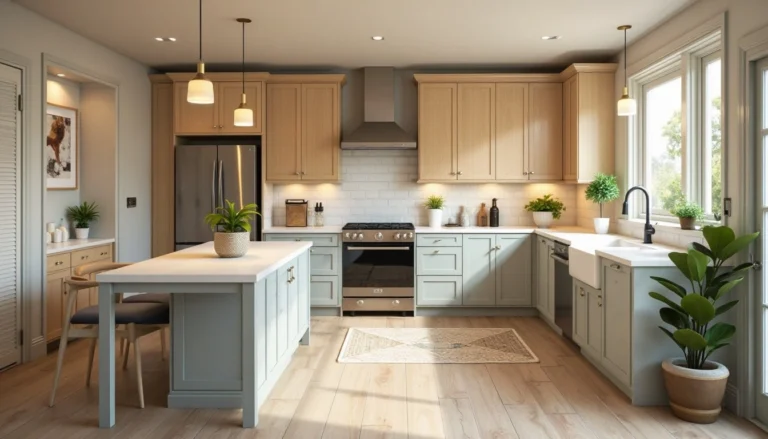
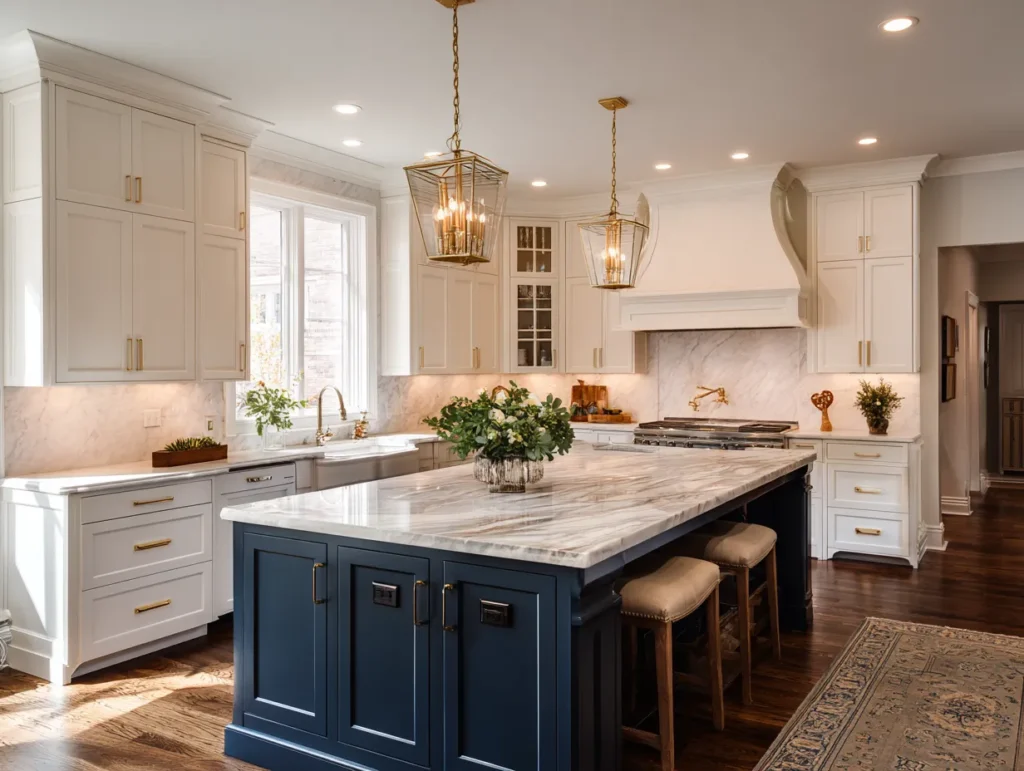
2. Add contrast on purpose.
Contrast = the anti-dated trick.
-
Walls, try a soft beige/green that plays nice with your cream, SW Comfort Gray LRV ~54 is a fan favorite when undertones align. Sample first; undertones are sneaky.
-
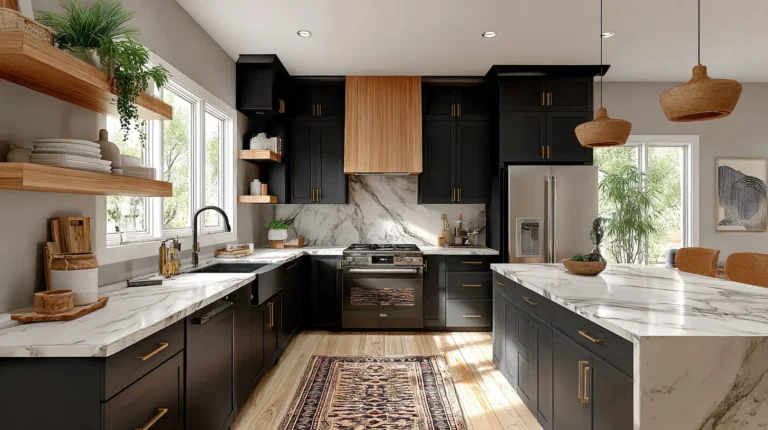
Island or floors, go deeper, walnut, oak, or a painted island. Homes & Gardens specifically recommends pairing cream with deeper tones to keep things lively rather than beige-on-beige
-
Backsplash, creamy cabinets love contrasty stone or tile. The Spruce shows cream with black-and-white marble tile or forest green moments for depth.
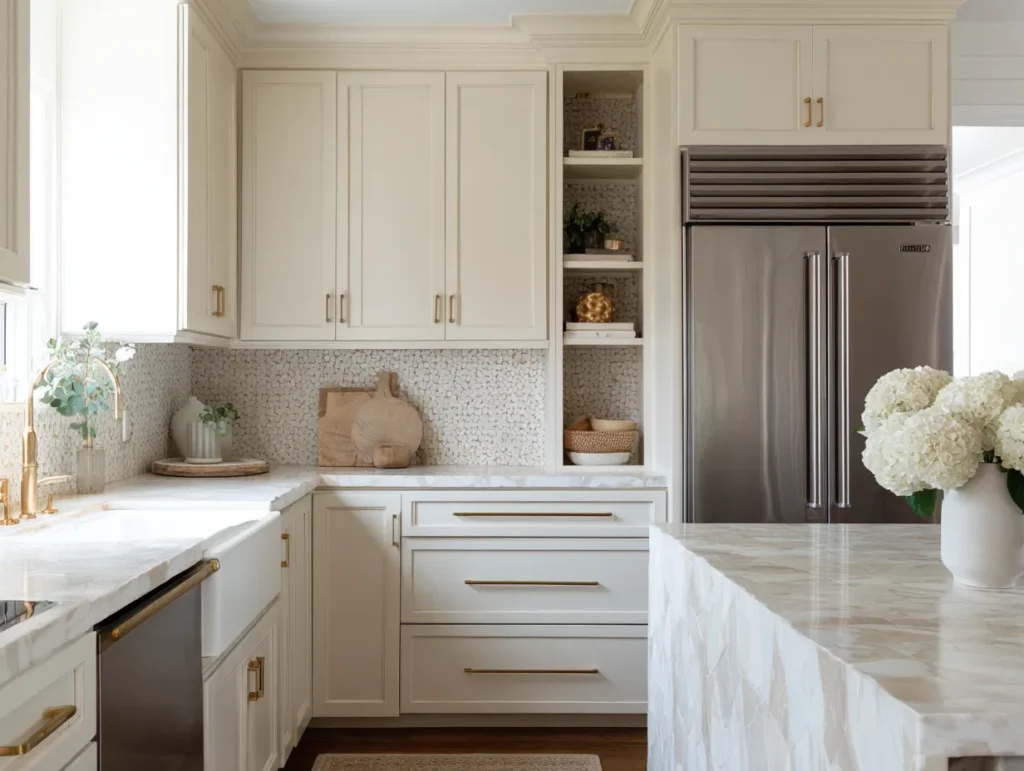
3. Choose honest textures.
Lean into real-looking materials: marble, quartz with subtle veining, glossy handmade-look tile, pale oak. That tactile mix is what makes cream feel intentional, not builder-basic. Domino’s take: natural counters + right shade + oversized hardware = fresh cream.
Bonus: a sliver of aged brass faucet, sconces warm the palette without tipping yellow.
Fast fixes if your cream already feels blah, weekend edition
-
Swap to longer pulls 8–10, matte black or unlacquered brass.
-
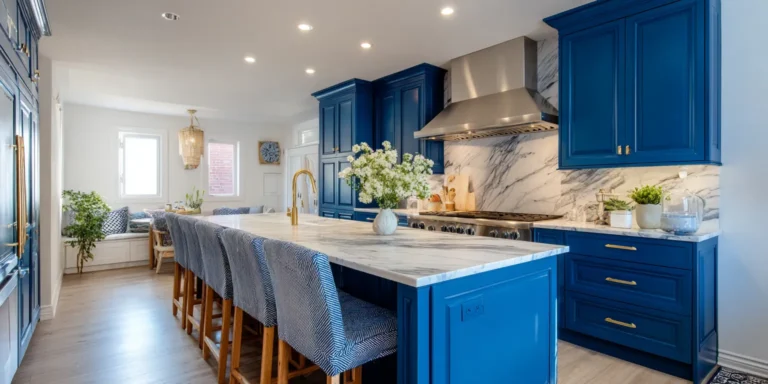
Paint just the island a deep neutral ink blue, charcoal, or olive, or do a contrast wall that flatters your cream.
-
Add texture: zellige tile, beadboard backsplash, or light oak stools to break up the sameness.
The Pairing Playbook walls, counters, backsplash, and hardware
Here’s the cheat sheet I wish I’d had: what pairs with cream kitchen cabinets so they read warm and luxe, not yellow and tired.
1. Wall colors that flatter cream tested + design-approved
Pick hues that whisper green, beige, so your cream doesn’t swing banana under warm bulbs.
-
Sherwin-Williams Comfort Gray SW 6205, LRV.54. serene gray-green that loves softer creams; sample first with your counters.
-
Benjamin Moore Revere Pewter HC-172, LRV.55. The classic bridge between warm and cool; great when you want contrast but not cold.
-
Designer tip. Undertones are picky. Kylie color pro) notes Comfort Gray is fab, but it can get touchy with deeper, yellower creams, so test beside your backsplash, counter. Ask me how I learned that… ugh
2. Counters that make cream look expensive
-
Light gray marble or marble-look quartz = instant quiet luxury. Real marble is gorgeous but high-maintenance (etches, stains); quartz is lower-maintenance and family-proof. Pick what fits your lifestyle.
-
Shop samples: browse light-gray veined quartz or marble-look quartz samples to see undertones next to your cream. A $7 sample can save a $7k mistake. Just saying.
-
Zellige handmade-look tile in white, off-white gives that soft, shimmery texture that cream loves. Look for “undulated or handmade look” in the product name.
-
Why it works: designers routinely pair cream with natural textures (wood, handmade tile, stone) to avoid the flat, builder-basic vibe. Homes & Gardens even calls out contrast + texture as the key to modern cream.
-
See it IRL: The Spruce’s cream-kitchen roundup shows cream with forest-green tile, aged bronze, and reclaimed wood, translation: contrast + honest materials.
-
Shop options: handmade-look white zellige and off-white mosaics at Home Depot. Order a case, return what you don’t use. My weekend strategy.
4. Hardware that keeps cream current, not cottage-only
-
Go bigger + cleaner. Oversized bar pulls or simple cups = instant update. Domino literally says the formula is right shade + oversized hardware + natural counters.
-
Finish picker
-
Matte black = crisp contrast, great with marble-look counters
-
Satin Aged brass = warm, layered, collected look, and yes, mixing metals is a thing now.
-
-
Shop fast: matte-black 10″ bar pulls designer length on a budget at Home Depot.
Quick combos steal these.
-
Cream + Comfort Gray walls + brass pulls + zellige = cozy-modern (my fave
-
Cream + Revere Pewter walls + black pulls + marble-look quartz = calm contrast, minimal fuss.
-
Cream + forest-green backsplash + aged bronze = moodier, English-inspired
DIY paths. paint vs. reface vs. replace, costs, timelines, and smart picks
Here’s the truth. Cream kitchen cabinets can be a weekend refresh or a full-on reno. Pick your lane
Option A. Paint what you’ve got, budget glow-up

Best for. Solid cabinet boxes in decent shape; you like your layout.
Cost. ~$80–$300 in materials if you DIY with a kit, more if you go pro-grade enamel. Rust-Oleum’s Cabinet Transformations line typically falls in the $30–$100 range, depending on kit/size.
If you want a tougher, furniture-like finish, look at Benjamin Moore ADVANCE, about $83.99 gal online, or Sherwin-Williams Emerald Urethane Trim Enamel, $120–$122 gal list.
Primer note. If you have oak grain old stain, a shellac-based primer, Zinsser B-I-N blocks tannins and grips like a champ.
Timeline. Plan 4–5 days of start-to-finish chaos or about 70 hours for a typical set, doors off, cleaning, degreasing, sanding, priming, two coats, curing. Sprayer = faster/smoother but more prep; brush roller = slower but simpler.
Why choose it? Small money, big visual change. You keep your boxes out of the landfill.
Basic game plan short + sweet. Degrease scuff sand prime shellac for stains, two enamel coats, satin or semi-gloss, cure before rehanging.
Option B, Reface new doors/veneers, same boxes
Best for. Boxes are sturdy, the layout works, and you want a new cabinet look.
Cost: National 2025 data says $4,200–$10,200 average $7,200, or $100–$455 per linear foot, depending on laminate vs wood veneer and door style.
Timeline. Usually 3–5 days on-site for pro-sized/complexity matters.
Why choose it? Faster, cleaner than a full replacement; huge style upgrade with new shaker doors in a perfect cream.
Option C. Replace stock, semi-custom, or custom.
Best for. Busted boxes, bad layout, or you’re doing new counters/floors anyway.
Cost installed. 2025 guides show $100–$1,200 per linear foot, depending on level, with typical kitchens falling $2,000–$24,000+. National averages cluster around $6,250–$15,000 for many projects. Stock = cheapest, custom = priciest.
Timeline: 1–2+ weeks depending on lead times, demo, and counter templating.
Why choose it? You get perfect sizing, storage upgrades, and factory-finished cream from day one.
Quick picks & tools, the stuff I reach for
-
All-in-one kit. Rust-Oleum Cabinet Transformations (budget-friendly color system).
-
Pro enamels. BM ADVANCE (waterborne alkyd) or SW Emerald Urethane levels smooth, cabinet-tough.
-
Primer for problem children, Zinsser B-I-N shellac-based) for oak grain/old stain.
-
Method choice. Brush/roller = simpler; sprayer = faster/flatter finish if you’re prepped and practiced.
Maya’s sanity check. Ask me how I know. Label hinges/screws in zip bags, dry-fit a door before rehanging all 20, and don’t rush cure time, even the best enamel needs it to avoid tacky edges.
Care & cleaning keep the glow, skip the yellowing drama
I love cream kitchen cabinets because they look soft and clean, right up until spaghetti night. Here’s the no-stress routine that actually works and doesn’t wreck the finish.
Your 10-minute weekly routine
-
Dust first with a dry microfiber cloth, crumbs + dust = sandpaper if you spray before wiping.
-
Mild wash: 1–2 drops of dish soap in warm water, wring cloth nearly dry, wipe doors/rails.
-
Rinse pass: clean damp cloth, no soap, then dry immediately with a towel. Water is the enemy of pretty seams.
-
Grease zones: around the pulls and the stove hood, do a second pass.
Stain & smudge triage save this
-
Grease fingerprints. Dish soap mix. 30-second dwell. Wipe, rinse, dry.
-
Tomato sauce splatters. Dab ASAP; don’t rub hard. If stained, repeat gentle cycles versus one aggressive scrub.
-
Marker crayon kids, I see you): start with dish soap; if needed, a barely-damp melamine sponge, very light pressure, test first.
-
Scuffs on lower rails. Try a drop of dish soap; if paint is scuffed through, touch up later, don’t over-scrub.
What not to use, please don’t tell me later.
-
No bleach, ammonia, vinegar, straight citrus solvents, powder abrasives, or steel wool.
-
Avoid oily furniture polishes on painted enamel; they can smear or attract dust.
-
Melamine sponges are micro-abrasive. Great in a pinch, but go gently and locally.
Touch-ups & chip control
-
Keep a labeled touch-up jar of your cabinet paint (or an enamel touch-up pen for nicks.
-
Add felt bumpers to doors/drawers; adjust hinges so doors don’t kiss each other, chips love corners.
-
If a door edge keeps chipping, a tiny bead of clear caulk along the back edge can soften the impact point, invisible from the front.
Kid-mess survival kit under $30-ish
-
6–12 microfiber cloths
-
A small spray bottle of soap mix lives here.
-
Drying a towel, an old flour-sack towel = perfect
-
Soft toothbrush for handle gunk & profile grooves
-
Optional. Gentle cabinet cream. Conditioner for occasional glow on factory finishes (spot test on painted).
Seasonal deep clean 30–45 minutes, quarterly
-
Take off knobs/pulls and soak in warm, soapy water; dry well.
-
Wipe door profiles with the soapy cloth + soft toothbrush.
-
Clean hinge sides gently, then dry.
-
Finish with a final dry buff so the cream looks satiny, not streaky.
Real talk. If your cream starts reading yellower over time, it’s usually lighting + surrounding colors, not “dirt.” Swap to 3000–3500K bulbs before you blame the paint. And yes, keep cooking splatter in check with a lid, grease screen, prevention beats scrubbing (ask me how I know.
Real-life mini makeovers before and after
I’m a sucker for a good we did it on a Tuesday night makeover. Here are three real-world snapshots with what changed, what it cost, and what you can copy, so your cream kitchen cabinets look intentional, not accidental.
Makeover 1. The “banana to balanced” fix weekend
Before: Cream cabinets, reading too yellow, nickel knobs, beige walls, busy granite.
After vibe. Soft, modern, balanced.
What we changed fast
-
Swapped to matte-black 10 bar pulls, clean lines = instant modern
-
Painted walls a soft gray-green undertones stopped fighting the counters
-
Popped in 3000–3500K bulbs so cream reads warm, not neon.
-
Added pale wood stools for texture.
Cost snapshot. $120,$220 hardware for 15,20 pulls, $45,$70 1 gal of wall paint, $20–$40. LED bulbs.
Time. One weekend, two pizzas, three podcasts.
Copy this. If your cream feels loud, dull the background with a calm wall color and add contrast in the hardware. Cheap, huge impact.
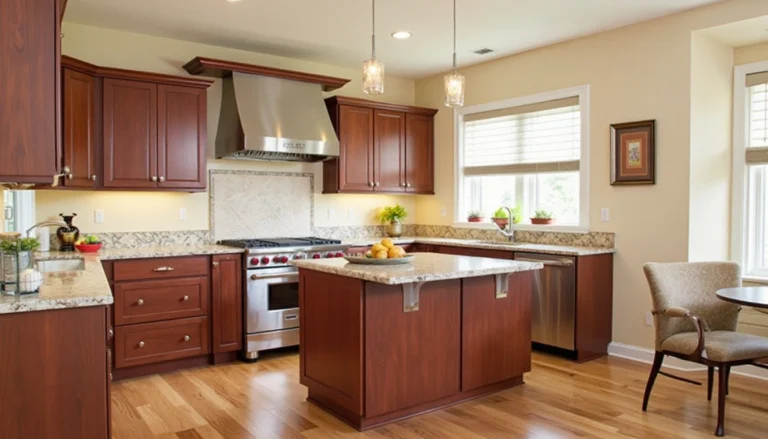
Makeover 2. Builder oak to quiet luxury 4–5 days
Before. Orange-y oak doors, decent boxes, tiny round knobs.
After vibe. Creamy, satin, classic-with-brass.
What we changed. DIY paint route
-
Degrease scuff sand shellac primer, two coats of cabinet enamel satin
-
Installed unlacquered or satin-brass cup pulls + matching knobs.
-
Swapped the old backsplash for off-white handmade-look tile with subtle texture, not shiny subway.
Cost snapshot. $200,$450 primer enamel/rollers, $150, $300 hardware for 20, 30 pieces, $4,$8,sq ft ceramic zellige, look, tile, $25 grout
Time. 4,5 days of real-life drying time is a thing.
Copy this: Choose satin sheen if your doors have bumps, you’ll get that velvety, furniture feel without highlighting every grain line.
Makeover 3. Small galley light on top, mood on bottom 2-3 days
Before. Narrow kitchen, all-cream cabinets, zero personality.
After vibe. Airy up high, cozy down low.
What we changed paint split
-
Kept cream uppers for brightness.
-
Painted lowers a deep green/blue (island too, if you’ve got one).
-
Added a runner rug (pattern hides crumbs, under-cabinet lights tape-light kit, warm temp, and simple black pulls.
Cost snapshot. $45-$70 1 gal for lowers, $30–$60 LED tape-light kit, $90–$200 hardware, ~$60–$120 washable runner
Time. 2-3 days, mostly paint + cure.
Copy this. In tight kitchens, two-tone breaks up the block of cabinetry. Keep upper cream for bounce, go moodier down low for depth.
Quick, do this, not that from these three
-
Do. Add one big contrast hardware, walls, or lowers. Don’t. Go beige on beige on beige.
-
Do. Match bulb temps across the room, aim 3000–3500K. Don’t. Mix 2700K and 5000K unless chaos is your brand.
-
Do. Bring in a textured element (tile, wood, woven stools). Don’t. Let everything be flat and smooth.
FAQs. The stuff you’ll Google at 1 a.m
Q1 What trim color works with cream kitchen cabinets?
Two easy wins:
-
Match your trim to the cabinets for a custom, built-in look a.k.a. color-drenching. Designers use this trick to make spaces feel seamless and high-end.
-
Or pick a soft, compatible white cream that shares undertones with your cabinets so nothing clashes. Sample first next to your backsplash, promise.
Q2 What light bulbs make cream look best?
Go with warm–neutral LEDs 3000, 3500K. Warmer light 2700K can push creams more yellow; cooler 4000K+ can look a bit gray/blue. The DOE’s lighting docs explain CCT ranges (2700K–6500K+) and why spectrum shifts what you see.
Q3 Best sheen for painted cabinets, satin or semi-gloss?
Both work. Satin hides more sins (older doors), semi-gloss is crisper and cleans easiest. Pros often name cabinet-rated enamels (like Emerald® Urethane) for durability.
Q4 Will cream cabinets yellow over time?
If you use oil alkyd-only paints, yellowing happens, especially in low light. Water-based enamel hybrids are formulated to resist yellowing vs oil read the spec, it’s right there). Keep strong ammonia cleaners off painted doors, too.
Q5 Does mixing brass + black hardware look weird?
Nope, mixing metals is mainstream now. Designers suggest choosing a primary finish and adding 1,2 accents for depth (for example, brass pulls + black sconces.
Q6 Are cream kitchen cabinets good for resale?
Neutrals = safe, broadly appealing. Real estate advice still leans neutral for selling and warns against overly specific trends. Cream reads warm and inviting, aka buyer-friendly
Q7 Are cream kitchen cabinets in style?
Yep. Warmer kitchens are having a moment, and cream kitchen cabinets are called out by designers as a 2025 favorite. Homes & Gardens lists “rich pale creams” as a top cabinet trend this year. The Spruce updated August 2025 also shows tons of fresh, modern examples, not country-only vibes.
Q8 What colors go well with cream cabinets?
Think undertone-friendly neutrals and soft contrast: grays and gray-greens like SW Comfort Gray or BM Revere Pewter (sample next to your counters so undertones don’t fight). Color pros flag that creams are picky partners, but those shades are repeat winners when matched carefully.
Q9 Are cream cabinets coming back?
They never truly left, but yes, they’re back and looking modern. Designers are pairing cream with oversized hardware and natural counters, Domino’s refresh formula, and calling it current rather than dated. Trend roundups for 2025 echo the same warm, creamy direction.
Shopping links & mini checklists, prices you can plan around
Here’s the quick, no-sponsor shopping cheat sheet I give friends. All picks play nicely with cream kitchen cabinets. Prices are what I’m seeing today. Always check your local store.
A. Cabinet paints & primer DIY + pro-tough
-
Benjamin Moore ADVANCE satin or semi-gloss, $83.99 gal in BM’s store. Levels smooth; cabinet-rated.
-
Sherwin-Williams Emerald Urethane Trim Enamel. WaPo pegs it around $120.49, gal lately, cabinet-tough hybrid enamel. Product info here.
-
BEHR Premium Cabinet, Door & Trim Enamel budget workhorse; WaPo lists $52.98, gal (semi-gloss) at Home Depot.
-
Primer for old oak stain. Zinsser B-I-N shellac-based commonly $70,$80, gallon at big boxes. Ace currently shows $74.99, gal. Blocks tannins like a champ.
-
DIY kit option. Rust-Oleum Cabinet Transformations, category shows $30–$100, depending on the kit.
Paint-day mini kit: tack cloths, 220,320 grit, quality 1.5,2″ angled brush, 4 foam rollers, deglosser, label bags, risers. Trust me, labels save marriages.
B. Hardware that modernizes cream fast
-
10-in matte-black bar pulls (designer length, Amerock & Hickory options; expect $23–$31 each at Home Depot for branded pieces, or value multi-packs online.
-
Budget alt: Ravinte 10 5-pack on Amazon solid for rental flips
-
Where to browse a ton (all budgets): editor-fav retailers incl. Home Depot, Amazon, Wayfair, Anthropologie, West Elm
Hardware cheat: pulls 1/3 drawer width, round up for bold. Matte black = crisp contrast. aged satin brass = warm & layered.
C. Backsplash. Zellige-like whites that add texture
-
Ivy Hill Tile ‘Amagansett/Kingston’ (white, handmade-look, many sizes; commonly $7–$10, sq ft at Home Depot.
Tile checklist: sample two whites, one cream-leaning, one neutral, hold under your actual 3000–3500K bulbs, and view next to your counters. Banana risk = low.
D. Under-cabinet lighting (warm, not hospital)
-
Commercial Electric 16-ft Tunable or Dimmable Tape-Light Kits, widely stocked at Home Depot. Watch for sales (often under $60–$140 tiers)
-
GE Cync strip options at Lowe’s, smart features available; prices vary
Lighting tip. Aim 3000–3500K, so your cream reads. Cream.
E. Keep-it-pretty cleaners
-
Parker & Bailey Kitchen Cabinet Cream, gentle fan-favorite on Amazon, 8–16 oz sizes. Great for factory finishes; spot test on fresh paint
F. Ready-made cream cabinets if you’re replacing
-
Home Decorators Newport Blended Cream, assembled plywood boxes, soft-close. Examples: 24-30 base cabs on promo $412-$441 right now, full line with sample doors.
Quick order list, print me.
-
Paint & primer. ADVANCE or Emerald + B-I-N for problem wood.
-
Hardware. 10 pulls black or brass + matching screws.
-
Backsplash. Handmade-look white tile + grout, warm white or light gray.
-
Lighting: 16 ft tape light kit, warm/tunable
-
Cleaner. Parker & Bailey for maintenance day
Wrap-up + printable checklists, pin this to the fridge
If you remember nothing else, remember this. Cream kitchen cabinets look rich when the undertones behave and the textures do the talking. You’ve got this. Messy bun, sample boards, brave heart.
Quick Win Cheatsheet color + vibe
-
Pick a cream that matches your counters’ undertone. Beige, yellow, or soft green.
-
Lock bulbs to 3000–3500K so cream reads cream, not lemon or gray.
-
Add one big contrast: walls, island, or hardware.
-
Bring in honest texture: marble, quartz veining, handmade-look tile, pale oak.
-
Choose hardware that’s longer, cleaner, black, or brass. To skip the cottage trap.
Paint Day Checklist DIY route
-
Degreaser + microfiber cloths
-
220–320 grit sandpaper or sanding sponge
-
Primer shellac for stained oak, standard bonding for painted
-
Cabinet-rated enamel satin = forgiving, semi-gloss = extra wipeable
-
1.5–2 angled brush + 4 foam roller or sprayer if you’re set up
-
Painter’s pyramids, risers, + label bags for hinges, screws
-
Drying rack area, ask me how I learned that the couch is not an option, ugh
Order of operations. Degrease, scuff prime, sand kiss coat 1, light sand coat 2, cure, rehang.
Styling Checklist makes cream feel modern.
-
Hardware. 10 bar pulls or simple cups, black or brass
-
Walls. soft beige green-gray that flatters your exact cream
-
Backsplash. Zellige handmade-look white or a contrasting color you love
-
Counters. light-gray marble or marble-look quartz for quiet luxury
-
Lighting. warm-neutral LEDs 3000–3500K + under-cabinet strips
-
One wooden note stool, cutting boards, and shelves for warmth
Maintenance Mini-Plan 10 minutes a week
-
Dry dust, mild soapy wipe, clean water rinse, dry immediately
-
Spot treat grease near the pull-out hood
-
Quarterly: pull hardware, clean profiles, buff dry
-
Keep a labeled touch-up jar for dings future you, says thanks
Budget Snapshot. Pick your lane
-
Paint the existing. $80–$300 materials DIY (biggest glow-up per dollar)
-
Reface. mid $$, fast install, new doors = new look
-
Replace. $$$–$$$$, best for bad layouts or failing boxes
One-minute pep talk
Test smart, style with contrast, and let texture do the heavy lifting. That’s it. That’s the “how do I make cream kitchen cabinets look designer? Secret. Now go make your kitchen the warm hug of your house