
How to Choose Stylish Wall Cabinets That Actually Work
I remember the afternoon I nearly gave up on my kitchen. The kids had just “helped” me organize the Tupperware drawer (which somehow made things worse), and I was standing there, arms crossed, staring at a pile of pots with no home. I swear the measuring cups were multiplying behind my back. That was the moment I realized something had to give — and spoiler: it wasn’t going to be my coffee maker or my sanity.
That’s when wall cabinets entered the picture. Not in a glamorous, Pinterest-worthy way. More like: me, in paint-stained sweatpants, wondering if I could drill into drywall without hitting a water line (I couldn’t… long story).
But here’s the thing: wall cabinets changed everything for me. They didn’t just clear my counters; they gave me breathing room. A little peace in the chaos. A place where things could go and stay and not tumble out every time I opened a door.
So if you’re feeling that same kind of frustration, like your space is working against you, this guide’s for you. We’re going to talk through wall cabinets from top to bottom: what they are, how to pick them, how not to install them (ask me how I know), and which ones are worth the money.
Whether you’re working with a tiny kitchen, a cluttered bathroom, or a garage that doubles as a drop zone, I promise there’s a wall cabinet out there with your name on it. And I’m here to help you find it, one shelf at a time.
What Even Are Wall Cabinets (And Why Do They Matter So Much?)
It took me a while to appreciate the quiet power of wall cabinets. For the longest time, I just saw them as those clunky boxes above the stove, the ones you open cautiously in case something plastic comes flying out. But after my fifth round of reorganizing the same counter clutter, I finally saw them for what they are: vertical sanity.
Let me back up.
When we moved into our current house, the kitchen had exactly three usable drawers and one lonely shelf above the microwave. I kept telling myself I’d figure it out, you know, make it “work for now.” But every morning, I’d find myself digging through stacks of cereal boxes just to find the salt. That’s when I realized I didn’t need more stuff, I needed smarter space. And that’s exactly what wall cabinets gave me.
They’re the unsung heroes of small and medium kitchens, mounted storage that lives off the floor and out of your way. You’ll find them above counters, fridges, laundry machines, even toilets if you’re brave. And they don’t just stash things, they shape the way a room feels. Once I added a few in my kitchen, it suddenly looked less like a chaotic corner store and more like a place an actual adult lives.
So What Counts as a “Wall Cabinet,” Technically?
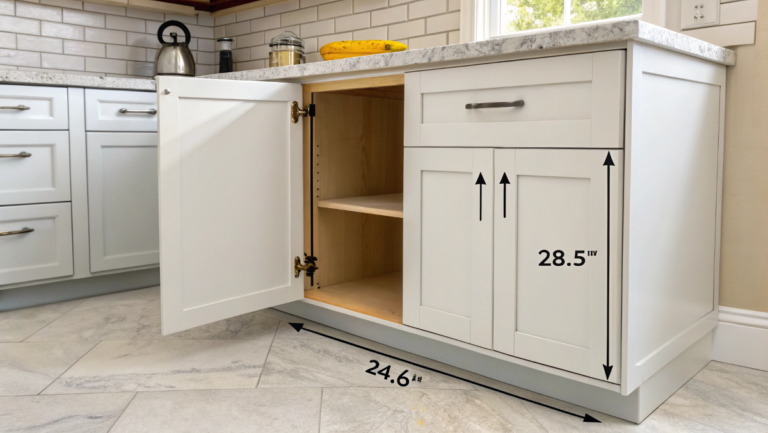
If it’s hung on the wall and doesn’t touch the ground, it qualifies. They come in different heights, widths, and depths, and here’s what I’ve learned (usually the hard way):
-
Heights: The most common are 30″ and 36″, I picked 30″ for above the stove because anything taller felt like a head bump waiting to happen.
-
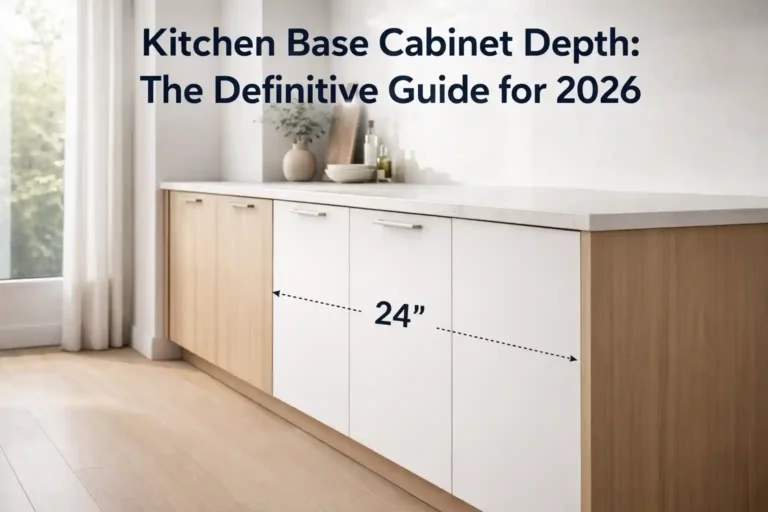
Depths: Kitchen wall cabinets usually stop at 12″ deep, which is just enough for plates but not so deep you lose your mixing bowls to the abyss.
-
Widths: These run in 3″ jumps, from narrow (like 9″) to wide (around 36″). I once installed a 15″ cabinet above my coffee station, and it felt like finding a secret stash of counter space.
But measurements only tell half the story. What sold me was the feeling of finally having a place for every weirdly shaped kitchen item I own.
Why I Think Wall Cabinets Are the MVPs of Home Storage
The first time I closed the door on a perfectly lined-up row of mismatched mugs (without one tipping over), I might’ve let out an actual happy sigh. There’s something quietly thrilling about storage that works with you, not against you.
And if you’ve ever stood there, coffee in hand, wondering where on earth to put your blender or cleaning wipes or that single Tupperware lid you’re emotionally attached to, wall cabinets might just be your new best friend.
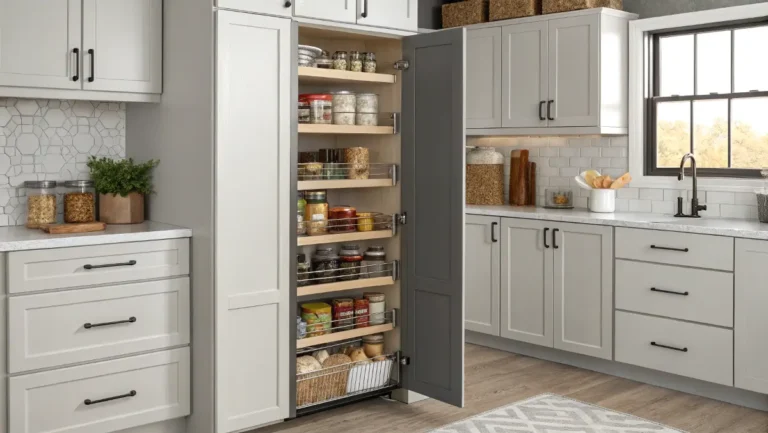
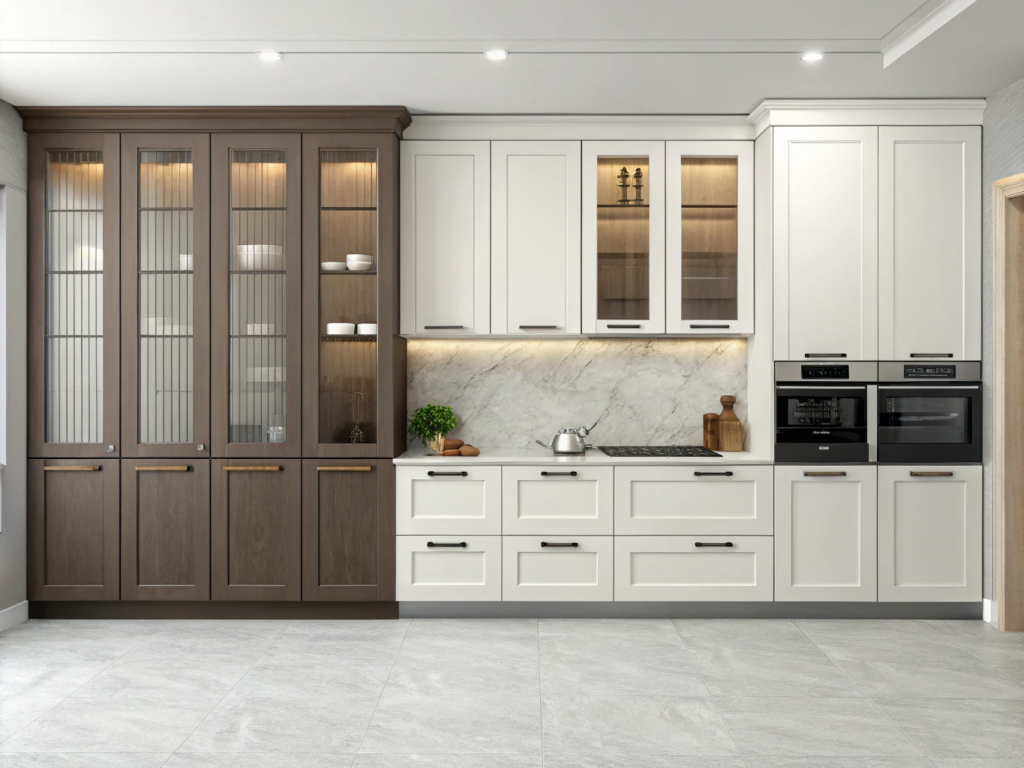
The Real-Life Types of Wall Cabinets (a.k.a. The Options I Wished I Knew About Sooner)
Okay, confession time: when I first started looking at wall cabinets, I thought there were, like, two kinds, the basic ones and the fancy ones with glass. That’s it. Turns out, the rabbit hole runs deeper than I expected. But the good news? You don’t need to know everything, just what works in real homes, with real kids, and real coffee mugs that multiply overnight.
So let’s break it down Maya-style, not contractor-speak, just plain, helpful categories based on where and how you’ll use them.
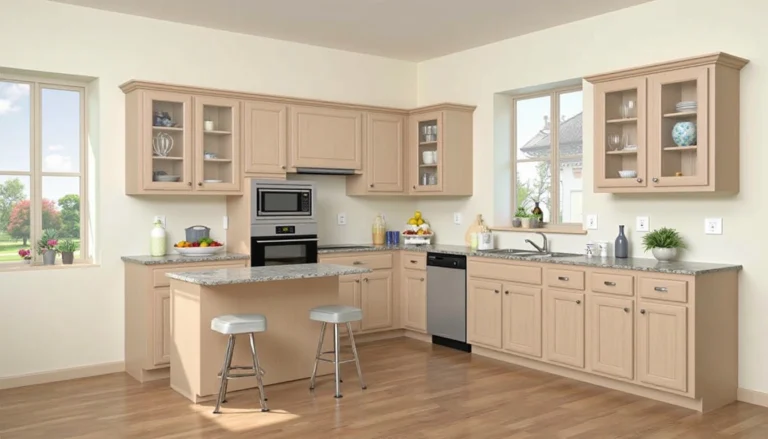
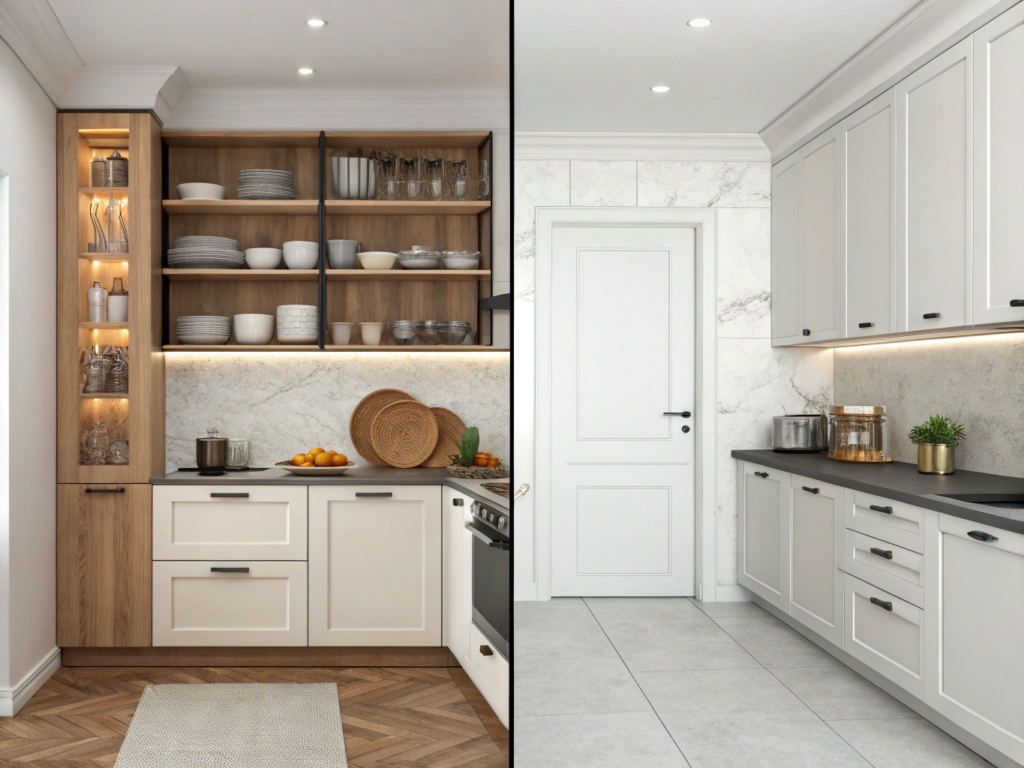
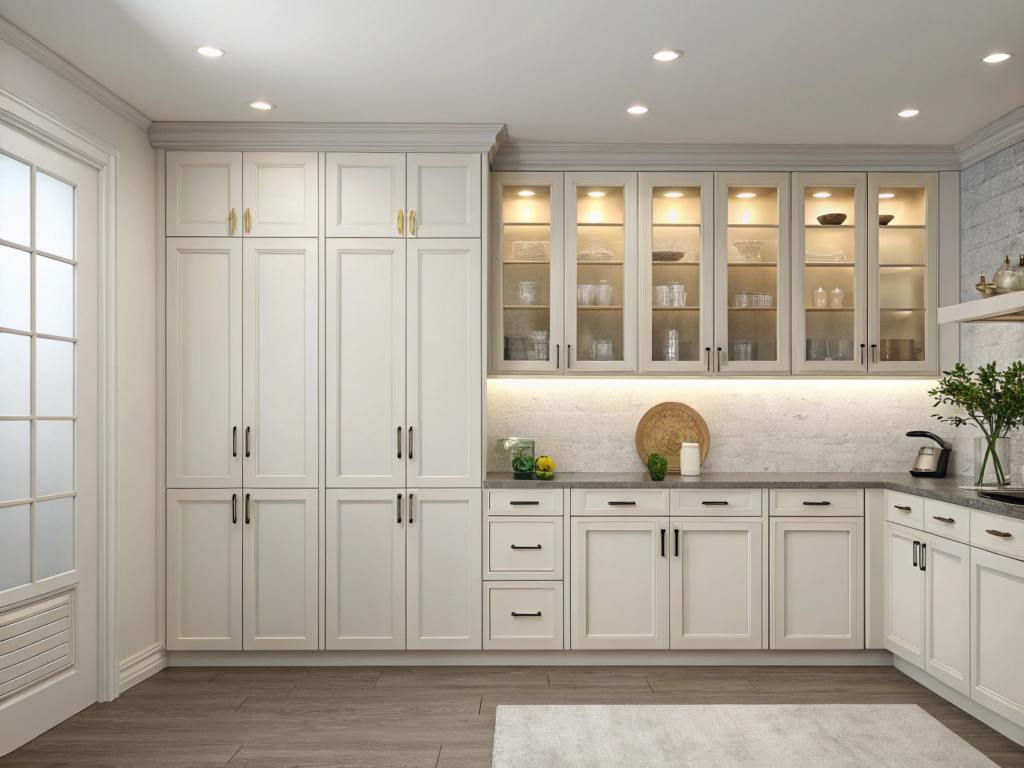
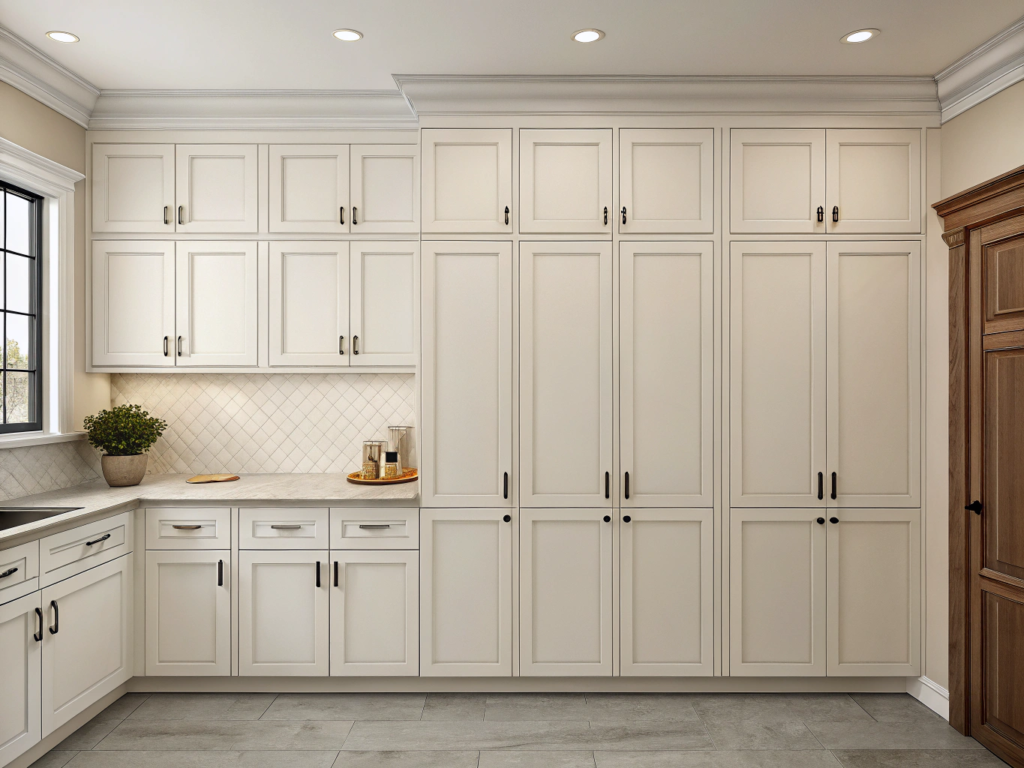
Kitchen Wall Cabinets (a.k.a. The Everyday MVPs)
These are the most common, and if you’ve ever opened one above a stove or sink, you know the drill. But there’s more variety than you might expect:
-
Standard box cabinets: Simple, rectangular, no drama. Great for plates, spices, and hiding the mismatched bowls you can’t part with.
-
Corner cabinets: Sneaky little things that curve or angle into unused corners. I messed up the measurements on one once and ended up with a door that only opened halfway, so measure twice.
-
Glass-front cabinets: Gorgeous, but be honest, do you want your guests to see your plastic tumblers? I use one for my “grown-up” glassware. (Which means it stays empty most weeks.)
Bathroom Wall Cabinets (Small but Mighty)
In our bathroom, the wall cabinet above the toilet is the only thing standing between me and towel chaos. These tend to be:
-
Shallower: Usually 4–8″ deep
-
Shorter: Around 18–24″ tall
-
Great for: Towels, meds, cleaning supplies, and the backup toothpaste I always forget I have
I installed ours with painter’s tape still stuck to the wall and a level that kept sliding off. But three years later? Still standing, saving me from morning madness.
Garage & Utility Room Cabinets (Heavy-Duty Heroes)
This is where I stopped caring about “style” and started caring about weight limits. These are built tougher:
-
Metal or moisture-resistant finishes
-
Deeper shelves for tools, cleaners, sports gear
-
Latches or locks if you’ve got curious kiddos (or a clumsy husband, sorry, babe)
My garage cabinet cost around $98 at Lowe’s and held up better than I expected, even after someone (not naming names) stored paint cans in it.
Floating Shelves vs. Traditional Wall Cabinets
Floating shelves are so trendy right now, but let me say this: open shelving is not for the faint of heart. If you’re tidy and want that Pinterest moment, go for it. But if you’ve got kids, pets, or just a chaotic streak (hi, it’s me), stick to closed-door cabinets. Out of sight = out of “where did I put that?!”
Framed vs. Frameless (Or: That Thing I Didn’t Know I Had Opinions About)
-
Framed cabinets: Have a face frame around the front. More traditional. Slightly sturdier if your walls aren’t super straight.
-
Frameless cabinets (a.k.a. European-style): Sleeker look, more accessible inside, but you’ll need precise installation. I installed one and instantly felt like my kitchen got a tiny upgrade. (Even if the cereal still lives in there.)
Maya’s Top Picks (Style Meets Sanity)
Here are a few styles I’ve tried (or drooled over) that made my short list:
-
Shaker-style white cabinet: Clean, classic, goes with everything (found mine for $129 at Home Depot)
-
Open cabinet with cubbies: Great for entryways or coffee stations
-
Faux-wood laminate cabinet: Easy to clean and doesn’t show fingerprints, bless
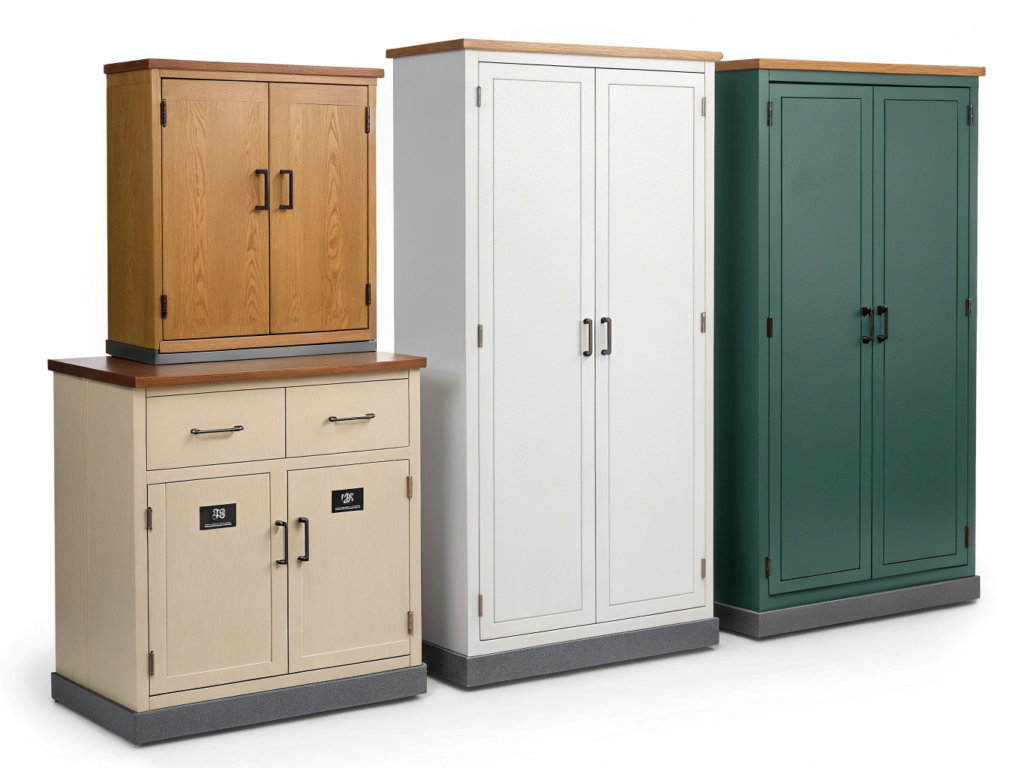
Materials & Finishes That Hold Up (Even When the Kids Are Involved)
I didn’t think much about cabinet materials when I started this whole wall cabinet journey. I was too busy Googling “how to hang things on drywall without crying.” But after a few scuffed doors, a mystery swelling issue near the sink (still don’t know what that was), and one overly glossy finish that felt like a magnet for fingerprints, yeah, I’ve learned a thing or two.
So here’s the rundown of materials I wish someone had explained to me before I impulse-bought that sleek cabinet that couldn’t handle steam.
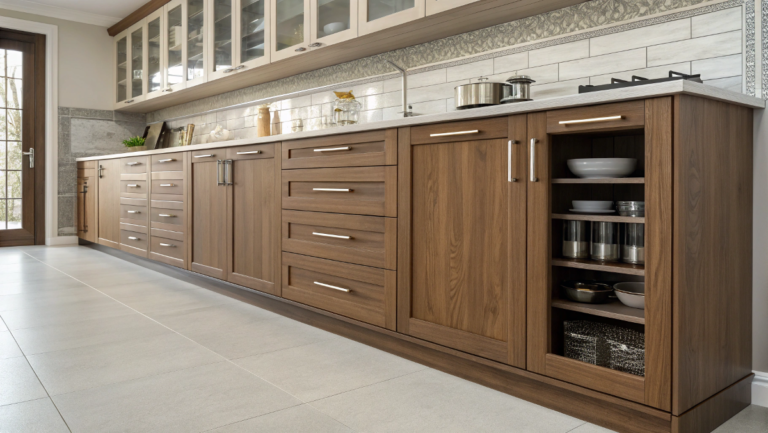
MDF, Plywood, or Solid Wood: The Real-Life Pros and Cons
Let’s keep this simple, no woodshop degrees required.
-
MDF (Medium-Density Fiberboard):
-
Affordable, smooth finish, and super paintable
-
But… don’t put it anywhere steamy. My MDF cabinet in the bathroom puffed up like a marshmallow after a few months. Lesson learned.
-
Great for: low-moisture zones (laundry room, hallways)
-
-
Plywood:
-
My current go-to. Stronger than MDF, still budget-friendly
-
Resists warping and can handle a splash or two
-
Most of my kitchen uppers are plywood with a laminate front, still going strong two years later
-
-
Solid wood:
-
Beautiful, heavy, and feels like you’re building a kitchen for the next generation
-
But pricey. Like, “maybe later” levels of pricey.
-
I have one in the laundry room that I salvaged and repainted; it’s my pride and joy.
-
Finishes: The Good, the Grimy, and the Why-Did-I-Choose-That?
This is where style meets daily stress.
-
Painted:
-
Looks crisp, easy to refresh
-
Scratches over time, especially near handles
-
I repainted mine last summer for $32 total (plus three hours of toddler interruption)
-
-
Laminate:
-
Budget-friendly, easy to wipe
-
Can peel if exposed to too much heat or steam
-
My garage cabinets? Laminated and still spotless (despite… everything)
-
-
Wood veneer:
-
The look of real wood without the solid-wood price
-
Classy, but don’t scrub too hard, ask me how I learned that with a Magic Eraser
-
-
Thermofoil:
-
Super smooth and easy to clean
-
Hates heat. Do not install above a toaster oven (you’ve been warned)
-
I used one in a pantry corner, and it’s held up fine, but I wouldn’t trust it over the stove again
-
Maya’s Real-Life Finish Test Checklist:
Before buying, I ask myself:
-
Will I be wiping jelly fingerprints off this every day?
-
Is it near steam, heat, or tiny wet hands?
-
Am I going to cry if this chips or peels? (If yes, keep looking.)
Honestly, the best finish is the one that makes you want to clean it, or at least not dread it. And for me, that usually means something semi-matte, light-colored, and just forgiving enough to hide spaghetti sauce splatters.
Planning & Measuring Without the Meltdown
There’s a special kind of stress that hits when you’re standing in your kitchen, tape measure in one hand, drill in the other, and three different YouTube videos open because none of them explain where to start. Been there. Deeply.
The first time I tried to measure for wall cabinets, I ended up with two different heights and a cabinet that looked like it was trying to escape the wall. I thought I had it all figured out… until I realized I didn’t account for crown molding. (Cue the sigh.)
So here’s what helped me plan and measure wall cabinets, the right way, not the “oops, I guess we’re patching drywall again” way.
Step 1: Start with What You Have
Before you even pick up a pencil, take stock of:
-
Ceiling height
-
Most ceilings are 8 or 9 feet. Standard wall cabinets come in 30″, 36″, or 42″ heights.
-
Rule of thumb: leave at least 18″ of space between the countertop and the bottom of the cabinet (I used 20″ and still bonk my coffee pot sometimes).
-
-
Where your studs are
-
Don’t just guess. I did. And I drilled into drywall with zero support the first time, my cabinet wobbled like a toddler on roller skates.
-
Use a stud finder or knock until it sounds solid (or just bribe your partner to help, mine’s the designated wall-knocker now).
-
-
Appliance clearance
-
Make sure the cabinet doesn’t hover too close to your microwave, fridge, or stove. I left 30″ above my range, and I still feel like I’m cooking in a phone booth.
-
Step 2: Sketch Your Wall (Badly Is Fine)
You don’t need a fancy floor plan. I used graph paper and a half-dried-out Sharpie. Just mark:
-
The width of your wall
-
Existing obstacles (windows, outlets, weird angles)
-
Where do you want your cabinets? Include how many, how wide, and how tall
I hung painter’s tape on the wall in cabinet shapes just to visualize. My neighbor Sarah thought I was measuring for a TV. Nope, just future Tupperware storage.
Step 3: Leave Wiggle Room
This is something I always forget: your walls might not be perfectly square. They rarely are. So:
-
Leave 1–2 inches of breathing room at corners
-
Don’t cram cabinets wall-to-wall unless you’re doing custom sizing
-
If in doubt, go slightly smaller, trust me, filler strips are your friend
Maya’s Quick Planning Checklist:
-
Ceiling height measured
-
Studs located (and marked!)
-
Appliance clearance confirmed
-
Wall sketched (bad art is still art)
-
Tape or pencil outlines marked
-
Cabinet quantity + width decided
-
Bonus: triple-checked the tape measure because last time, I didn’t
Planning isn’t glamorous, but it saves you from the sinking feeling of holding a cabinet that definitely won’t fit. Ask me how I know.
Installing Wall Cabinets (Or: Why My Husband Now Double-Checks the Stud Finder)
I still remember the day we installed our first wall cabinet. It was supposed to be a “quick Sunday project.” Three hours, six wall anchors, and one mild marital dispute later, we had a very slightly crooked cabinet and a mutual agreement: I’d do the planning, and he’d handle anything involving power tools.
If you’re thinking about installing wall cabinets yourself, first, deep breath. It’s doable. But there are a few things I wish someone had told me before I ended up drilling into a vent line (don’t worry, we patched it).
The Tools You Need
This is what we used — and yes, I had to borrow half of it from my neighbor, Linda.
-
Stud finder (that works)
-
Level — preferably a long one, so you’re not second-guessing every line
-
Drill + drill bits (with a fully charged battery, unlike mine)
-
Painter’s tape or pencil for marking
-
Ledger board or cabinet jack (trust me, your arms will thank you)
-
Wood screws — 2.5” is the sweet spot
-
Patience. (No store sells this, but it’s a must-have.)
The Steps (With Real-Life Pitfalls Baked In)
1. Mark your studs and your layout
-
Use that tape or pencil to outline where the cabinets go.
-
Don’t skip this, I did once, and the result was… abstract.
2. Attach a temporary ledger board under the line
-
This supports the cabinet while you screw it in.
-
If you skip this and try to hold the cabinet while drilling? Let’s just say: gravity wins.
3. Pre-drill holes in the cabinet back
-
Makes installation smoother and reduces split wood.
-
I forgot this step on my garage install. Regret. Regret everywhere.
4. Lift, level, and screw into studs
-
Ideally, with two people, or one person and a stack of cookbooks (been there).
-
Start with the center screw, check the level, and adjust as needed.
5. Repeat for each cabinet, joining them as you go
-
Use clamps to hold them tight while securing.
-
This is where I learned that “close enough” isn’t good enough when doors start swinging unevenly.
When to Call a Pro
Look, I’m a big fan of DIY, but some walls just don’t want to cooperate. If you hit any of these:
-
Crumbly drywall or plaster
-
No visible studs in the right spot
-
Super heavy cabinets (like solid wood pantry ones)
-
That sinking “I’m out of my depth” feeling
… then it’s okay to tag in the pros. I once had a contractor finish a wall I had half-started. He didn’t even laugh (out loud).
Maya’s Honest Tip:
Before you install anything permanent, hold the cabinet up and pretend to open the doors. I once hung a bathroom cabinet and realized it blocked the mirror. Now it lives in our garage, full of random light bulbs.
Best Places to Buy Stylish Wall Cabinets That Won’t Eat Your Whole Paycheck
Let’s be real: shopping for wall cabinets sounds fun… until you’re five tabs deep, comparing wood grain names like “Espresso Cloud” vs “Cinnamon Drift” and wondering why they all cost more than your monthly groceries.
After doing this dance way too many times (and dragging my kids through more hardware aisles than playgrounds some weekends), I’ve landed on a handful of places I trust, where the prices make sense, the options don’t overwhelm me, and the whole thing doesn’t end in a cabinet-shaped meltdown.
Here’s where I go when I want something sturdy, nice-looking, and not suspiciously cheap.
My Go-To #1: The Big Box Option
Local hardware stores, yep, I’m talking about those orange and blue-logo giants. They’re not glamorous, but they’ve got what I need.
-
I once picked up a plain 30-inch white cabinet for just under $150 and installed it the same weekend. Still standing. Still hiding our cereal collection.
-
If you’re lucky, you can grab display models for a discount. I did this once on a rainy Tuesday and felt like I’d won a prize.
What I like: I can touch the doors, see the true color (lighting online lies, by the way), and bring it home the same day.
What I don’t: Their websites are overwhelming unless you already know what you want.
When I Want Clean and Modern: The Flat-Pack Place
There’s a certain Swedish store where everything smells like cinnamon and comes with confusing instructions, but hear me out. Their wall cabinets are sleek, affordable, and surprisingly durable.
I used two of their upper cabinets in my laundry room makeover last spring, and they’ve held up beautifully. (Even survived a detergent spill. And a juice box incident.)
My only tip? Double-check the measurements before you buy. Their sizes can be quirky, and your American tape measure might throw side-eyes at the metric labels.
Budget Breakthrough: Secondhand Gold Mines
This one’s for the treasure hunters: reclaimed building supply shops, local salvage yards, and Habitat ReStore locations.
-
I scored a solid oak cabinet for $40 last summer. It was dusty, sure, and the hinges squeaked like a haunted house. But after a little elbow grease and leftover paint? Gorgeous.
-
You’ll need to be patient and flexible. You may not find matching sets. But sometimes that’s the charm.
Honestly, this is where I send friends who want “that vintage look” without the vintage price tag.
Online (Only When I’ve Had Coffee and Patience)
If I have to shop online, I’ll use it for browsing, then try to find the same thing locally. But if shipping’s free and reviews are solid, I’ll click “add to cart.”
Quick tips from someone who’s learned the hard way:
-
Read past the five-star reviews. Look for photos. Zoom in.
-
If the price feels too good to be true? It probably is.
-
I always factor in return shipping. That $89 cabinet cost me $40 to send back last year because the box showed up half-crushed.
My Buying “Rules” (They’re Flexible, Like My Budget)
-
Under $150 is my sweet spot for a standard upper cabinet.
-
No matter what, I pick hardware myself, even if it costs extra.
-
I won’t buy anything until I’ve measured the wall three times (ask me how I learned that one).
Frequently Asked (And Sometimes Embarrassing) Wall Cabinet Questions
Look, we’ve all googled things like “how to find a stud in the wall” and “can a cabinet fall on my head?” at 11 PM. No judgment here. I’ve been that person, more than once. So let’s just put it all out there: the weird questions, the practical ones, and the ones we think we should already know.
Because chances are, if you’re wondering… I probably messed it up once already.
How much weight can a wall cabinet hold?
Short answer: It depends. Long answer: If you mount it into studs correctly, most standard cabinets can handle 30–50 pounds per linear foot. That means yes, it can hold dishes, mugs, canned beans, and even your secret chocolate stash (just saying).
That said, if you’re loading up big appliances or 18 cast-iron pans, double-check the specs and use extra screws. Also, maybe don’t store your bowling ball collection up there. Common sense wins.
What’s the right height to install them?
There’s a “golden” rule, apparently: the bottom of the cabinet should sit about 18 inches above your countertop.
But here’s what I did: I mocked it up with painter’s tape and just stood there pretending to reach for plates. I even held up a frying pan like I was mid-breakfast. If that feels good? That’s your height.
Also, make sure the doors don’t hit your range hood, light fixture, or forehead. Trust me.
Can I install cabinets on tile?
Yes, but proceed with caution (and a really good masonry bit). I’ve done it once, and my hands were sore for two days. You’ll need wall anchors, patience, and nerves of steel if you’re drilling into shiny subway tile.
If you’re nervous, call in backup, or at least phone a friend who won’t laugh when you break your first bit.
What if my walls aren’t level or square?
They probably aren’t. Old houses are charming until you’re trying to hang three cabinets in a straight line. Here’s what I did:
-
Use a laser level (or at least a long one with some painter’s tape)
-
Mount a temporary cleat or ledger board underneath to keep things lined up
-
Leave a little wiggle room at the edges; filler strips exist for a reason
And hey, slightly crooked cabinets build character. That’s what I tell myself anyway.
Do I need to seal or finish my cabinets after installing?
If they’re pre-finished, no. But if you painted them yourself (like I did with my infamous “drip door”), a protective topcoat helps. Especially in high-moisture spots like bathrooms or kitchens.
Pro tip: I used a water-based polycrylic for my kitchen cabinets. No yellowing, easy to clean, and I only spilled it twice.
What are those cabinets attached to the wall called?
Most folks (and most salespeople) just call them wall cabinets. But you might also hear terms like “upper cabinets,” “overhead storage,” or “mounted units,” depending on the room. In kitchens, they’re usually paired with base cabinets, while in garages or laundry rooms, they often stand alone like little storage heroes.
I used to call them “the floating ones” before I knew better, because honestly, that’s what they look like when you first install one. Slightly magical, slightly intimidating, totally useful.
Is it cheaper to buy ready-made cabinets or have them custom-built?
Short answer? Buying pre-made or stock cabinets will almost always cost you less. I once picked up a prebuilt 30-inch wall cabinet at a big-box store for about $140. When I asked a local carpenter for a custom version of the same thing? Let’s just say I laughed, then politely declined the $500 quote.
Custom’s great when your space is tricky or your style is ultra-specific, but if you’re working with standard walls and a modest budget, buying off the shelf is a smart move.
What are the typical sizes that wall cabinets come in?
This part confused me for way too long. Wall cabinets don’t come in just one “standard”; they’ve got options. The ones I see the most (and use myself) include:
-
Heights: 12″ for over-the-fridge spots, 30″ and 36″ for most kitchens, 42″ for tall ceilings
-
Depths: 12″ is the go-to for kitchens; sometimes 15″ in other rooms
-
Widths: Usually 9″ to 36″, in 3-inch steps
Honestly? My secret weapon is painter’s tape. I map out cabinet shapes right on the wall before buying. Helps me visualize and also freaks out my husband just enough to offer help.
How much does it cost to install a wall cabinet?
If you’re doing it yourself (and I have, more than once), you’re looking at the price of the cabinet, a few tools, and maybe a new bit for your drill. I’d estimate around $100 to $200 per cabinet total, assuming no fancy hardware or emergencies.
Hiring someone? Expect to pay $50–$100+ per unit just for labor. I got quoted $600 once for a three-cabinet install and decided to spend the money on pizza, coffee, and a weekend DIY session instead. Worth it? Even if one of them is still a little crooked.
Final Thoughts: One Good Cabinet Can Shift Your Whole Kitchen Mood
I used to think big changes required big budgets, full kitchen renos, shiny new appliances, maybe a wall coming down. But the truth? Sometimes it’s just one wall cabinet. One cabinet that gives you back your counters, your headspace, and a little bit of calm during the morning rush.
That’s what happened when I finally installed mine. Suddenly, the clutter had somewhere to go. The counters felt clearer. I could find the olive oil without knocking over the blender. And for once, the kitchen didn’t feel like a battle zone.
So if you’re staring at your walls thinking, “Would a cabinet even help?”, let me say this: yes. Yes, it might. Start with one. Even a little one. Especially a little one. The beauty of wall cabinets is how quietly they transform things. No fanfare, no drywall dust (well, usually), just a space that finally works the way you need it to.
And if you mess it up a little along the way? Welcome to the club. That’s part of the charm.